The difference between being a survivalist and a refugee, is preparedness. A survivalist is someone who, through study, practice, thought, and gear, insures his or herself that they can survive being a refugee as best they can. That’s it, a glorified refugee, but one who’s prospects for surviving the crisis, and even comfortably surviving the crisis, are vastly superior to the common refugee, and not dependent on assistance from others to get by.
This is the first part in a series about building a portable emergency kit that you can grab and go in case you have to leave your home in a hurry for any reason. There may be many reasons for this, natural disasters such as flood, fire, hurricane, or other natural disasters, or it may be societal, such as loss of rule of law, a nuclear or biological disaster or attack, or anything up to the zombie apocalypse. For purposes of my series, I will refer to the “zombie apocalypse” as a catch all phrase for “Have to leave home right now and become a refugee for some amount of time”.
The first thing to consider is when do you know it is time to bug out? Fundamentally, you are almost always better off NOT bugging out. You have all of your stuff at home…food, shelter, water, your belongings, etc. Bugging out is a last resort, and should only be considered viable if one of two conditions are met. The first condition is, your home is unliveable and puts you in imminent danger, or there is some kind of mandatory evacuation order. Maybe a flood or forest fire is rolling in and is expected to engulf and consume your home. Maybe there is a radiation threat, or something along those lines that will put you in severe danger if you stay. Maybe Big Brother will come knocking on your door and demand you leave or be incarcerated against your will.
The second condition is, if things are so bad, that you are willing to get out and take the chance that when you return, your home and everything in it may be looted or burned to the ground when you return, and you are prepared to accept that as the price for survival of yourself and your loved ones. It should be that bad. Assume everything you leave behind will be lost forever if you leave, before you leave. Living in a war zone is probably the most common scenario here, with millions of people being forced to leave their homes for short or long term every year.
So, you have determined that it’s time to get you and your family out of Dodge as quickly as possible. What you want to have is a ready to go, prepared kit that you can grab and be out of the house and on your way in minutes….a modern Minute Man (or Woman). The first thing you will need is something to keep it in, and this will be discussed later in the series in a more in depth manner. For starters, the ideal way to keep your kit is in a backpack of some sort. It should be durable, comfortable, and have a fairly large capacity, in my opinion, a minimum of 65 Liters in size, but 80 Liters or more is much better. Smaller statured folk should have their own bag as well, kids, women, and smaller sized men. Even those who have some handicaps should have something they can grab that has whatever essentials they require, that meets their particular needs and abilities.
That is not to say that I think you should run out and buy a fancy backpack immediately as your first item, I don’t think that, but it should be high on the priority list. You should first collect certain necessities, and find a way to gather and carry them. A suitcase will work just fine for starters, or a gym bag, or duffel bag. These things are not ideal, but they allow you to just grab them and go, so they serve the basic need. Don’t wait too long, though, to get yourself a good, durable backpack. It is much easier to carry things on your back for days on end than to carry them with your arms, and there is a lot to be said for keeping your hands free as well.
As I stated before, more on carrying options will be discussed toward the end of this series.
Let me pause here for a moment and ask the reader a question. Do you have a fire extinguisher in your home? Why not? A fire extinguisher is the difference between a stove top grease fire, and a house fire. It can save your home and save you from being forced to bug out. Be your own first responder. You can respond to a grease fire in seconds, but the local Fire Department will take many minutes to even arrive. Minutes destroy homes and costs lives. Before you buy anything at all, get a fire extinguisher. It can save you, your home, and your family.
So, we have arrived at the point where it is time to bug out, for whatever reason. The first consideration is having a kit, that you can grab and go in as short a time as possible.
The second consideration in bugging out is transportation. Most people have 2 options, their vehicle, and their feet. A vehicle is better. You can take more stuff, you can go farther and faster, and your vehicle is also a portable shelter. A vehicle that gets good gas mileage, has 4 wheel or all wheel drive, and some capacity to carry more stuff and enough room to sleep comfortably in is best.
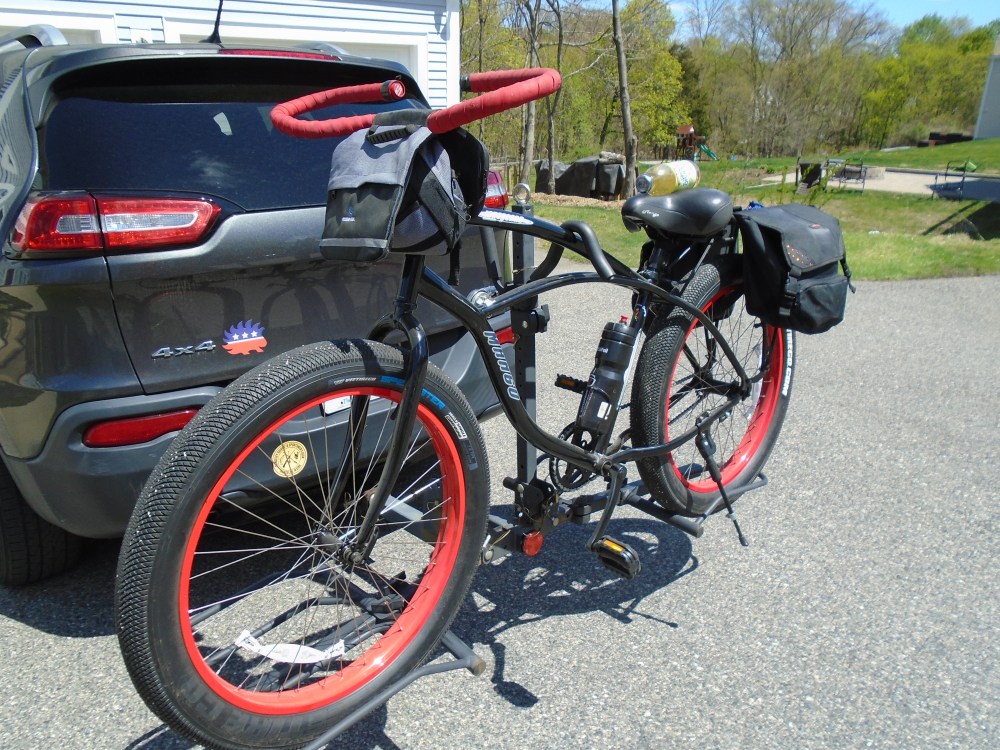
BUT…it requires gas, and roads, and roads that are open, and not blocked by authorities, or bandits, or the glut of evacuation traffic which can make it a parking lot. At this point, you may have to abandon your vehicle and put the feet to work. Unless, of course, you have a bicycle! A bicycle is an underrated and awesome piece of emergency survival gear. It is quiet, does not require gasoline, or open roads, can cover many miles in a day, and if you have the right bicycle, can travel on and off road equally well. You should have a bicycle as one of your first pieces of bug out gear, and your vehicle should have a means of carrying it. When it comes time to bug out, assuming you have the time, the first thing you should load your vehicle with after your bug out bag, is your bicycle. Your bicycle should have some carrying capacity such as panniers and handlebar bag, also. Extra carrying capacity is always good, and you will want to keep certain things with your bike such as tools for repair, some parts such as an extra chain, inner tubes, and patch kits. A water bottle is also something that is very inexpensive and no reason not to have.
Now, finally, we get down to discussing our Bug Out Bag kit, and the first thing you will want to consider and acquire is shelter. Shelter is critical. In poor weather, you will die without shelter, and it is the hardest thing to create from scratch and salvage. If you have camping gear, such as a tent, that is fantastic shelter, but consider and assess it’s shortcomings and whether it is good enough. Will your camping gear be durable and warm enough for all 4 seasons? Is it compact and light enough that you can carry it on your back if you have to? If not….it is still viable for your vehicle bug out, but you will want something you can carry if you have to abandon your vehicle. You also need to take into consideration all of your family that will need shelter as well.
For me, that is two people, myself, and my spouse, and I will discuss the choices I made for my kit. Everyone is different, and every situation is different. If I lived in Arizona, I would make different choices than I do living in New England. If I had more than just two people to consider, my choices may be different. Your choices will be different than mine, but I will try to explain my thought processes in making my choices as I go.
First of all, I like camping, and my shelter of choice is a hammock and tarp. I started with inexpensive gear, which worked just fine, but over the years I have upgraded to more premium gear, so the things I will discuss are not budget options, but what I consider ideal options, and I use them so they are worth the expense to me.
Hammocks are a great option for shelter. They are compact, lightweight, comfortable for most people, though not everyone, and they isolate you from the ground, which is one of the main considerations for shelter, especially in cold climates. They have limitations, of course, all options do. Especially in the area of being adequate for 4 seasons. Generally speaking, shelter systems will be a very large part of your kit, in size, in weight, and in expense. This picture shows my entire shelter kit, all of which will be stuffed into my backpack and take up much of the size and weight capacity of my kit.
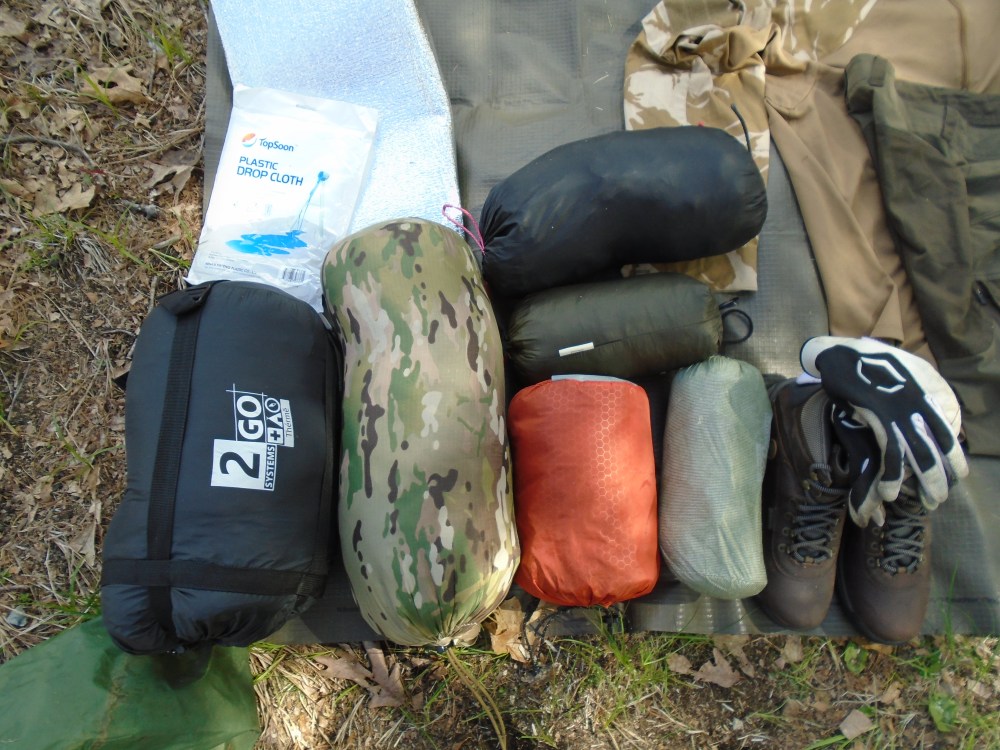
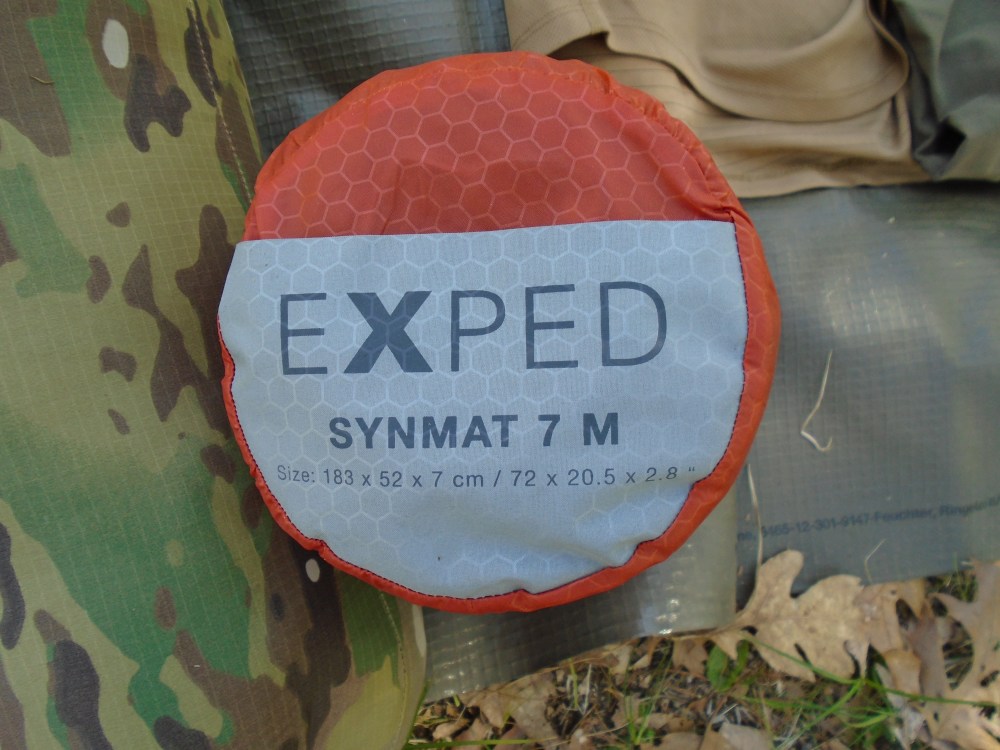
What I have in this photo are the following; Top left, a plastic drop cloth, and a piece of reflective foam much like the common windshield shades that people put in their cars to prevent the sun from turning their car into an oven. Left bottom, a 2Go Systems Therme sleeping bag, which is down with a layer of mylar sewn inside of it for it’s thermal reflective properties. In the camouflage stuff sack is a Wilderness Innovation PSB (Personal Survival Blanket), which is a closed cell foam blanket, which I have used for many years now, in all weather and seasons. The black stuff sack contains a Dutchware Gear Chameleon hammock, with double layer, with bugnet. In the green stuff sack below that is my Dutchware Gear Wide Winter Tarp, 12 foot xenon tarp with side panel pull outs. In the orange stuff sack is my sleeping pad, a Synmat 7 inflatable sleeping pad with internal insulation.
To the right of the sleeping pad is my 2GO Systems Trifecta, a tarp/bivy multi use piece of gear made of Tyvek, so it is extremely lightweight and waterproof, with a reflective inner.
To the right of all this are boots, gloves, and clothes which I will highlight later in this article.
So, that is my shelter system in nutshell, which is enough to keep me warm and dry well below freezing temperatures. If I have to bug out in warmer seasons, I will just ditch what I don’t need rather than carry everything. In matters of life and death, all things are disposable. Only carry what you need, but carry what you may need as long as necessary until you decide you don’t really need it.
My spouse will carry her own hammock, and sleeping bag, and sleeping pad, and Trifecta bivy which can be used as a tarp in a pinch, but I will carry the tarp, as my system is for two hammocks set up under one tarp, and this is what I will discuss now.
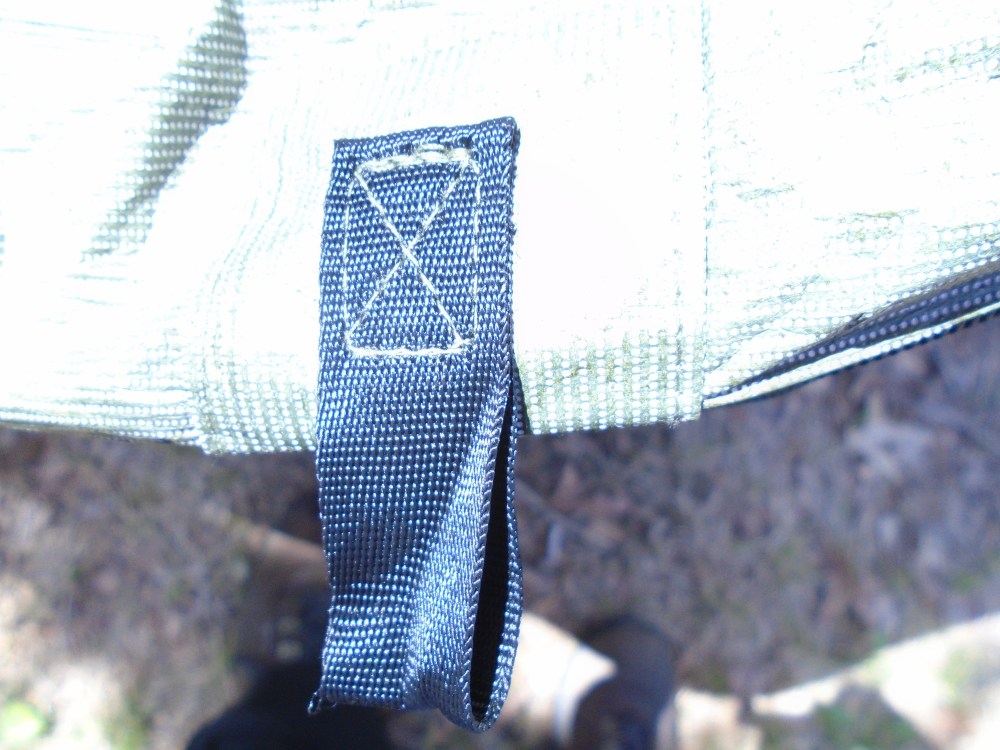
How do you set up two hammocks under one tarp? Side by side, using the same two trees, and to provide space between them, all you need is a stick.
Some tools will be needed to cut and groove the stick.

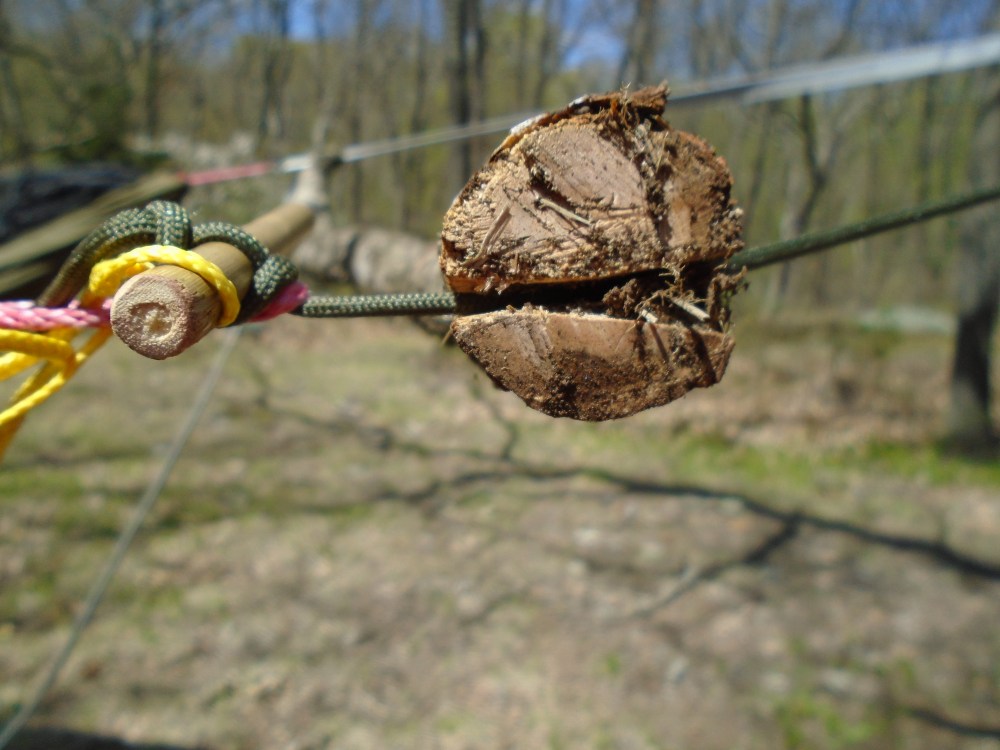
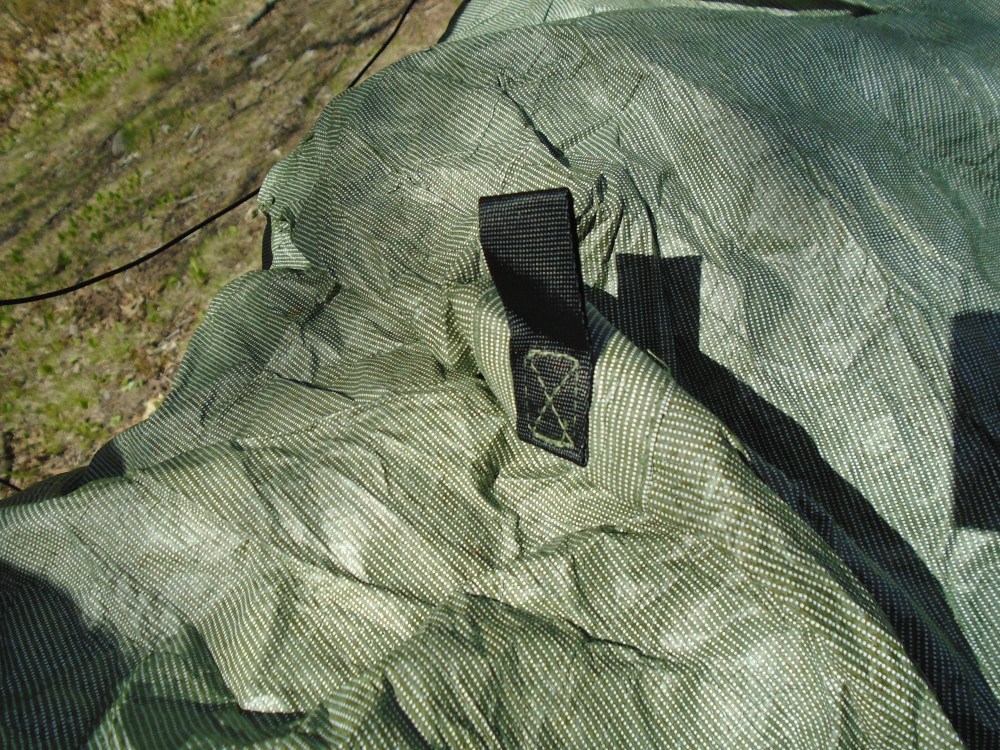
Then you just put the stick at the head end of the hammocks and that keeps them separated but parallel.
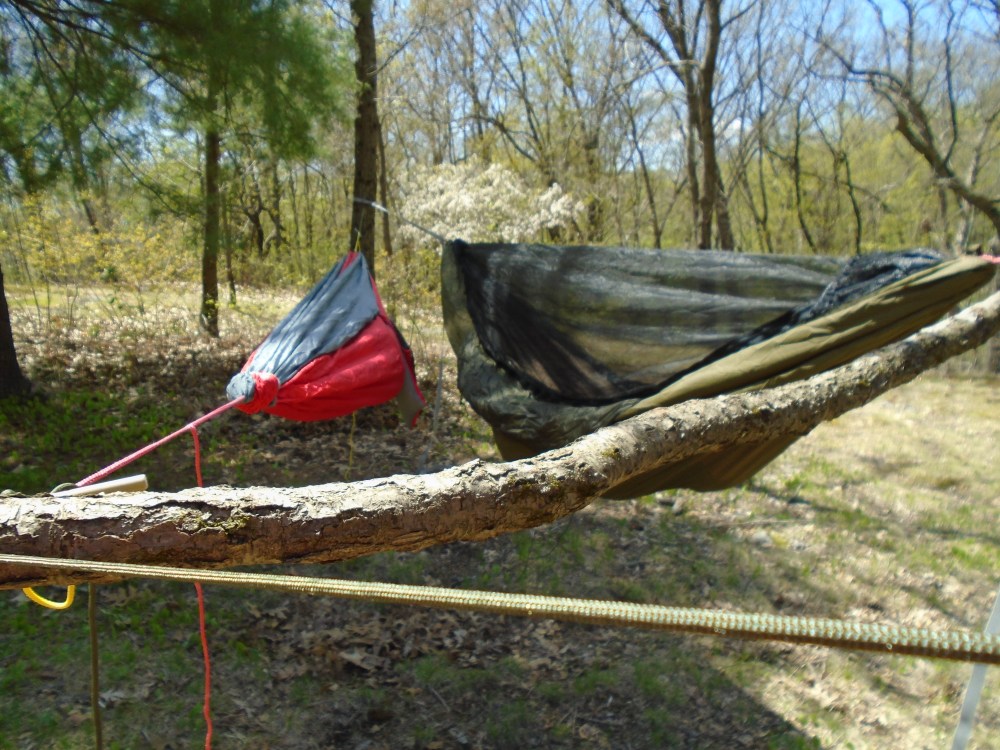
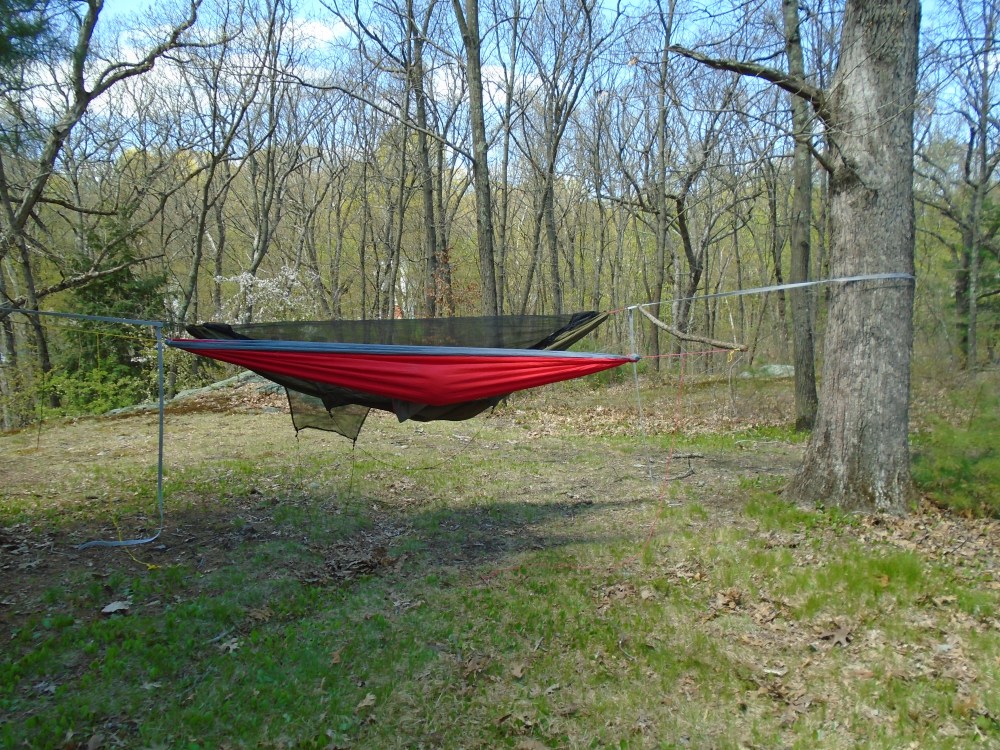
With a large tarp, this gives plenty of room for the taro to be hung over the hammocks and keep them sheltered from the elements.
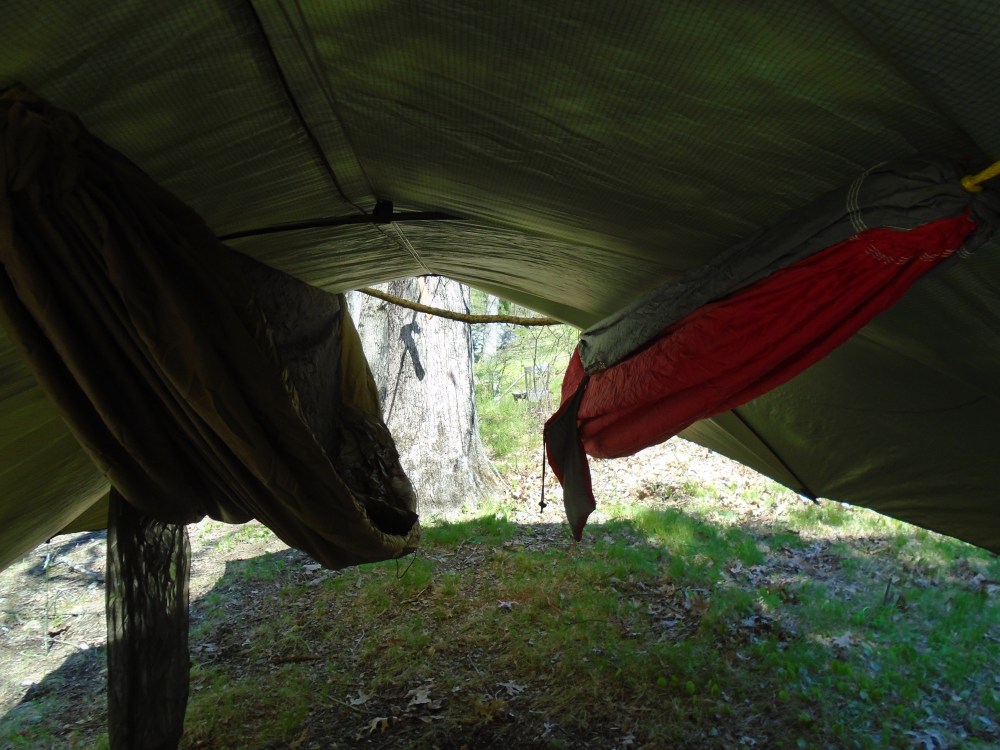
You may see that I have some poles along the ridgeline of the tarp which expands it give more room beneath in this photo, as well as the photo in the header.
These are collapsable and lightweight, but they are really part of my camping gear, and won’t be in my kit. Instead, I will use these to accomplish the same thing, because these ARE a part of my kit;
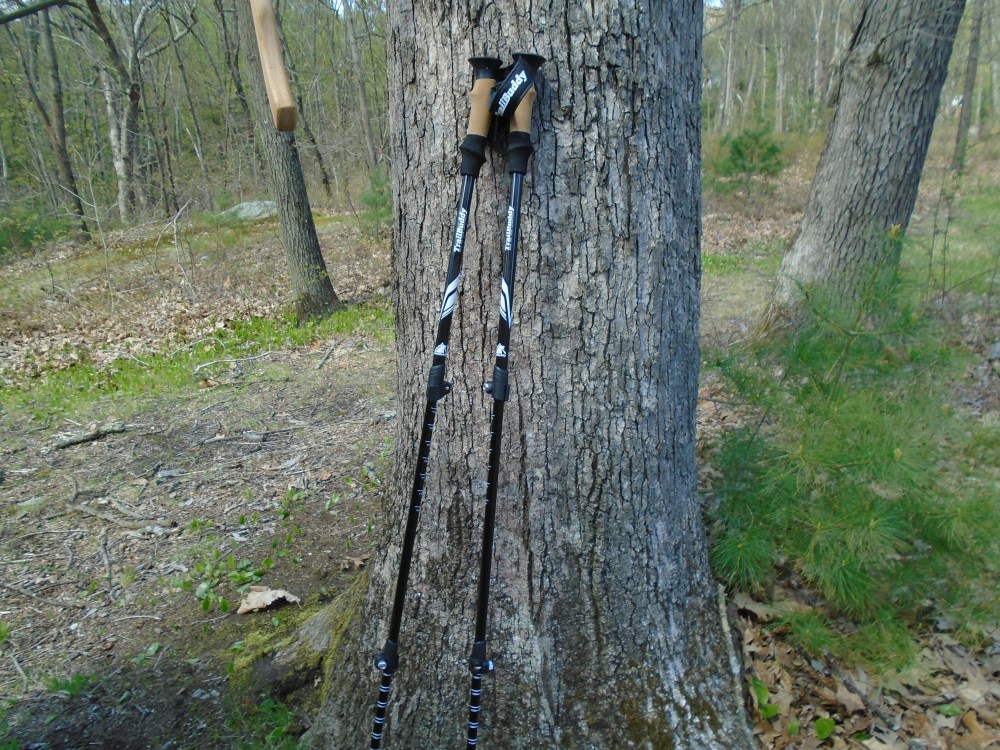
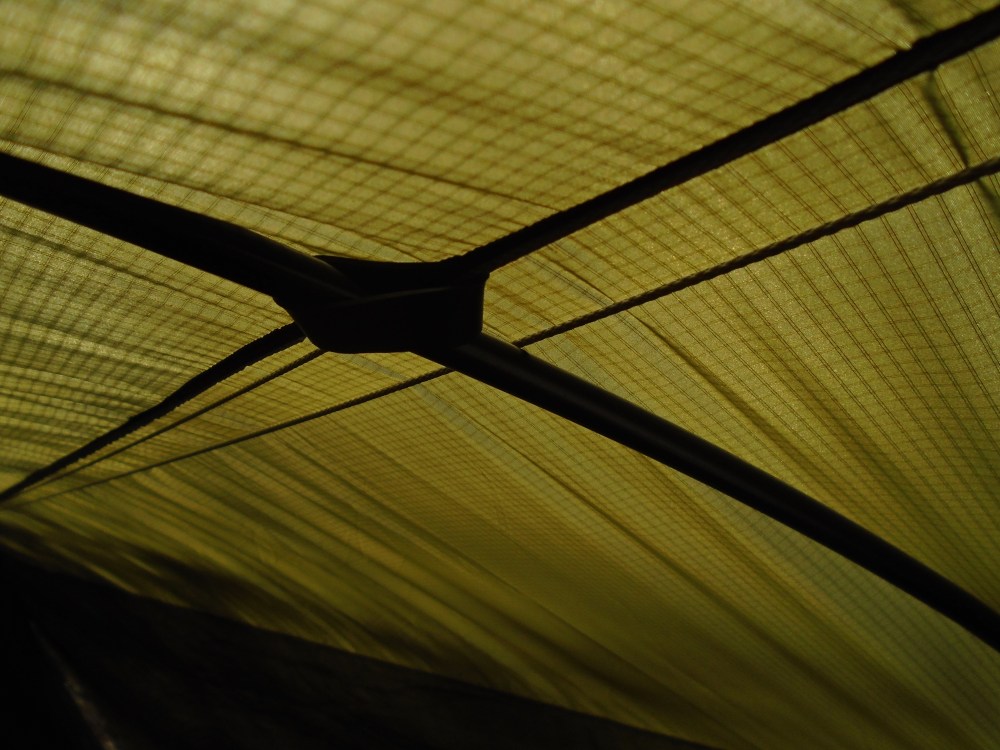
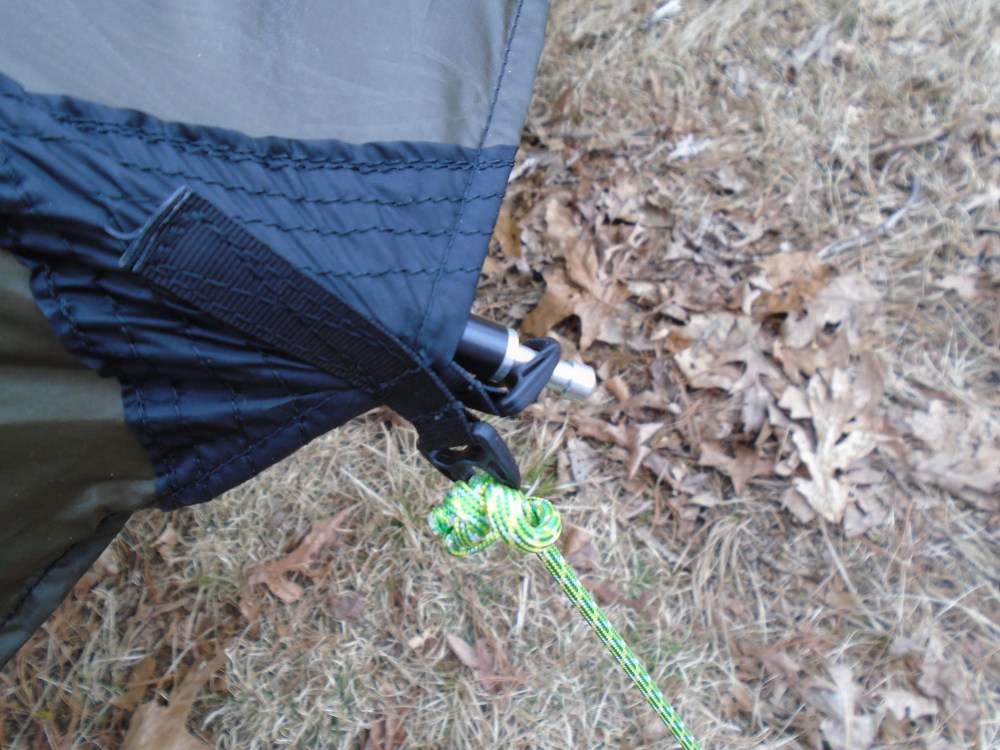
With the side panel pullouts on the Dutchware tarp, and some shock cord, I can extend the poles to their maximum length and use them to expand the tarp for maximum space beneath.

It’s really easy to do, nothing special required.


As I stated before, I am a hammock camper, and my hammocks are double layered, so you can slide sleeping mats inside them, between the two layers of fabric. Typically, I use the sun shade, which protects me from heat loss via convection, inside the hammock.
After that, I just throw my Wilderness Innovation blanket as my quilt, and that keeps me plenty warm down to about 5o degrees.
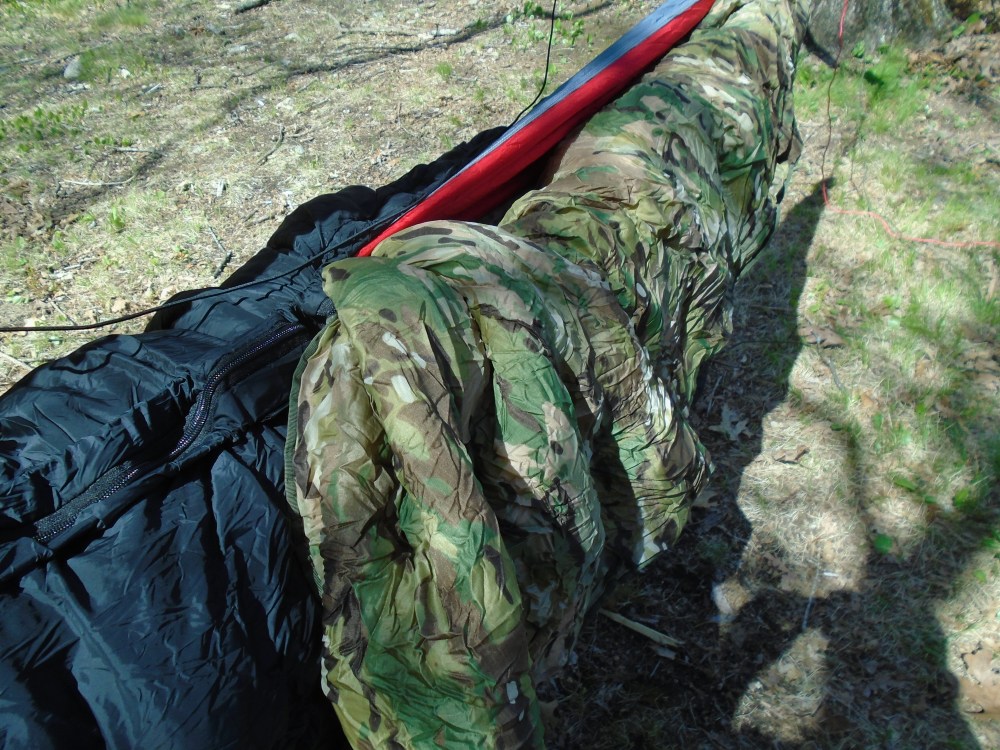
When it gets colder, I bust out the 2Go Systems Therme.
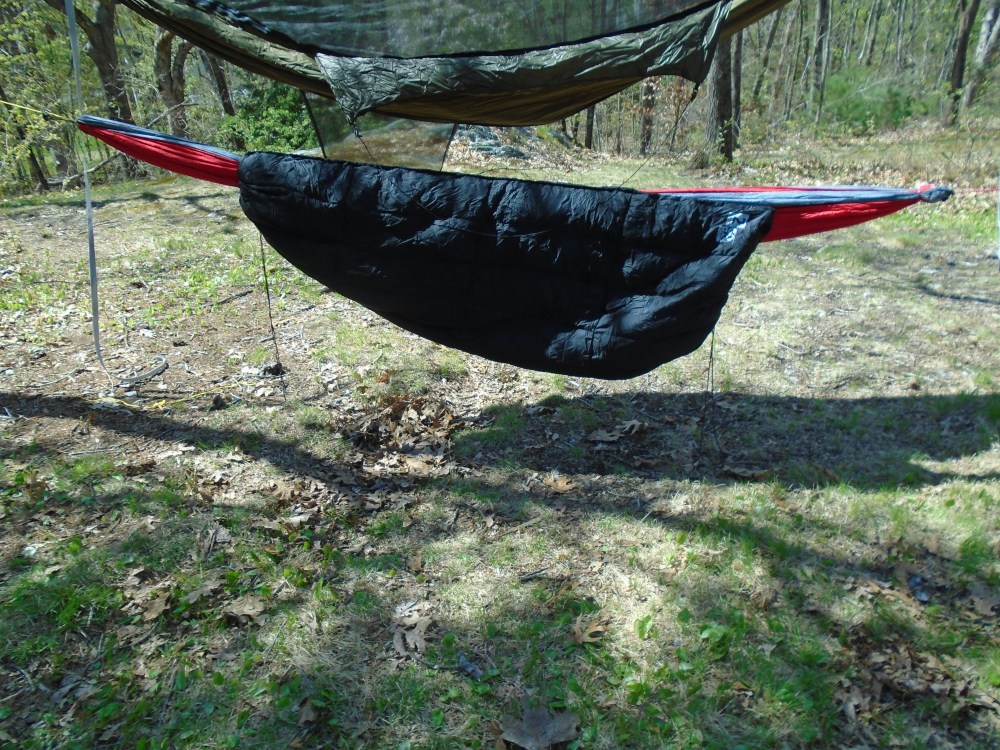
The Therme is an amazing piece of gear. It is a down sleeping bag with a layer of mylar woven into it. It can be unzipped to use as a blanket, and it also has shock cord and hooks on each end so it can be slung as an underquilt, or zipped up so it becomes a cocoon wrap for the hammock.

These hammocks are 11 feet long, so the Therme covers head to toe in insulation.
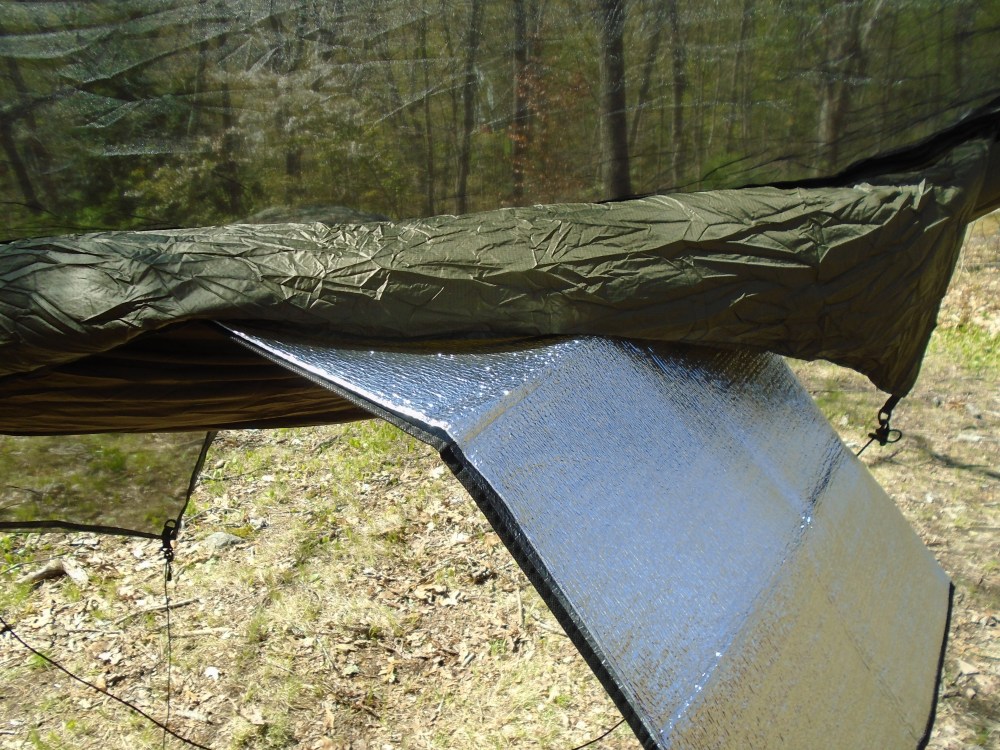
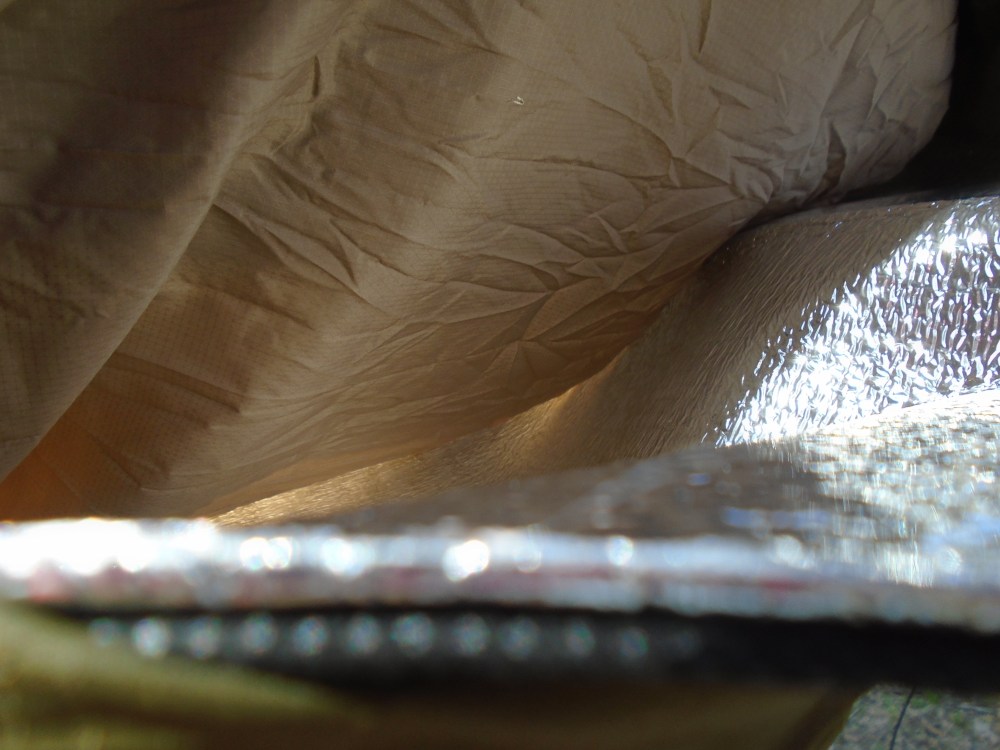
That should easily take me down to freezing temperatures if need be, along with my WI blanket. If the weather is really bitter, I can slide my Exped Synmat 7 into the hammock, which has a warmth rating of over 4, and the 2Go Systems Trifecta can cover the whole thing as a suspended bivy, wrapping me in down and tyvek with 2 layers of mylar around me.
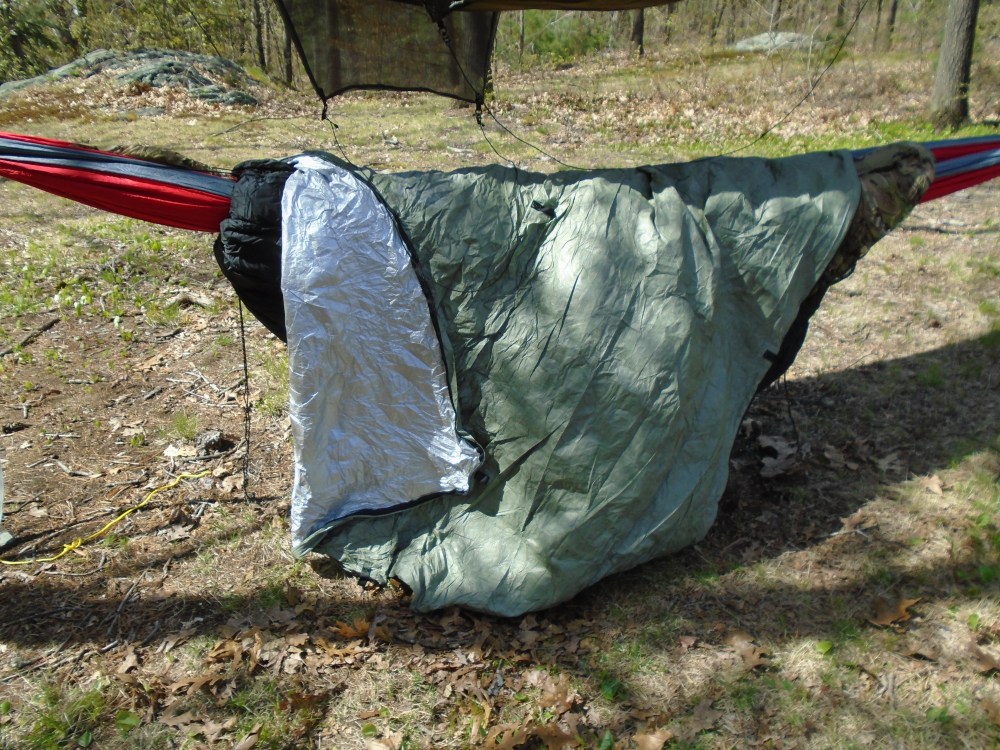
The Trifecta incorporates plenty of loops and pullouts, as well as a waterproof zipper to rig it up as a bivy or tarp, or whatever I require.
With all this, I can sleep comfortably well into the negative temperatures in Fahrenheit if I have to.
The Trifecta, along with my sleeping pad, and clear plastic drop cloth, also give the option of rigging a Kochanski super shelter on the ground, should the situation require it.
With all this kit, I have all I need to create a proper ground shelter as well, should a suspended hammock not be possible or desirable, such as wanting to keep a lower profile. I can just lay my sunshade on the ground, my sleeping pad on top of that, and sleep with my Therme or blanket, using the Trifecta as a small lean to tarp, or as a bivy with my Dutchware tarp overhead. I specifically chose the colors of my kit to be subdued, but not overly tactical, either. My tarps are not camo, but neither are they bright orange. I can use some natural materials to make them blend easily into a woodland environment.
Last but not least, in shelter systems, is clothing. It is a good idea to have a few clothes with your kit, 3 pairs of socks, 3 pairs of underwear, a long sleeve shirt, a short sleeve shirt, a pair of good hiking pants, gloves, and some kind of head covering. It is important to keep one pair of socks clean and dry for sleeping in. Damp dirty socks can ruin your rest, and promote undesirable problems like fungus growth and infections on your overworked, sweaty feet. You will also need some kind of rain gear, something to keep yourself dry in the worst of conditions. I have a Wilderness Innovation poncho that I use, which also has features allowing me to use it as a tarp or a hammock if I have to. That’s just redundancy that I like. Any good, durable, lightweight rain gear will do, a poncho, or rain jacket and pants. Also, a hat or something to cover your head is a good idea, to protect against both rain and sun. Lastly, I highly recommend something to protect at least your head from biting insects. Bug repellent is fine, but it runs out and doesn’t always work against the nastiest of insects. A head net always works. Nothing can ruin your day, ruin your morale, and ruin your rest like a horde of black flies feasting on you at the best of times, let alone at your lowest, most desperate times.
One rule to abide by is avoid cotton wherever possible. There is a saying in the survival and hiking communities, “Cotton Kills”, and that’s because of the way cotton handles moisture and humidity. It absorbs water easily, dries out slowly, and acts as a refrigerant when wet. There are many cases of hypothermia every year that could have been avoided simply by wearing polyester or wool instead of cotton. This applies to undergarments as well. You want stuff that will dry quickly. Dampness promotes fungus, infection, and blisters.
A couple of items I chose for my kit are a good pair of hiking pants, Fjallraven Keb trousers, which have lots of features I won’t go into, and an Under Body Armor surplus shirt. I love the shirt because it is durable, has padding on the arms and shoulders for bearing heavy loads, which will be useful in a bug out scenario, and a thin, breathable mesh on the body, for cooling. This makes it an ideal bug out shirt, in my opinion.

You may notice the boots int he photo. I keep a new pair of good hiking boots with my kit. You just never know what you will be wearing when the crisis hits. Most footwear will be inappropriate for bugging out. Myself, I wear hiking boots every day, all day. I don’t even own sneakers. I have been wearing the same make and model boots for years, just buying a new pair every 2 years or so. Therefore, I know that the new boots are durable, will fit me, and won’t require breaking in to avoid blisters or other problems. My only concern is whether the boots I am wearing will have enough life in them when the time comes, so a new pair ready to go makes sense, they will last me up to two years.
Here is a photo of the boots I am wearing as I took these photos, next to the new ones. Other than wear, they are identical boots.

The ones on the right are fast approaching retirement. When it comes time, I will buy another pair, and replace them, leaving the pair on the left for my bug out kit.
I chose these boots because they are really solid budget boots with the features I look for. They are Timberland White Ledge “waterproof” boots.
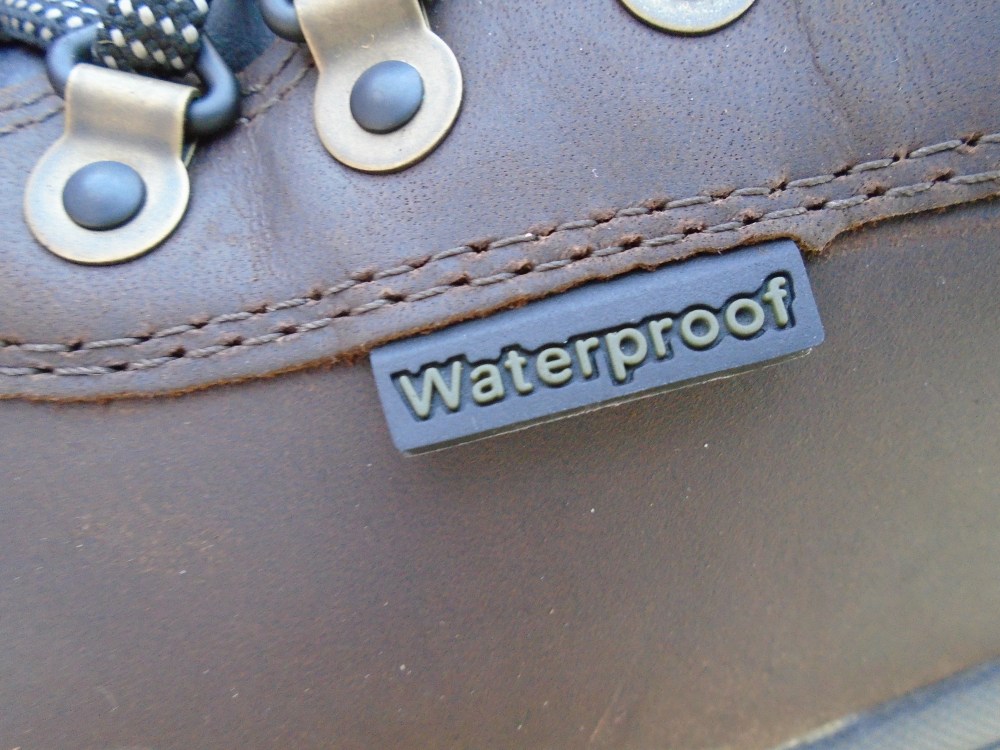
Let me tell you, waterproof they are not. They are full leather. Leather absorbs water. You can make them waterproof easily, a variety of ways, but you lose something in breathability then. I don’t do it. Should I need them to be waterproof in my bug out, I have something in my bug out first aid supplies I can use to waterproof them, namely Bag Balm, which is a lot like Vaseline. That will do for waterproofing if I need it.
The features I like about these boots are good arch and ankle support, full leather makes them durable, especially to things like rocks and thorns, and they have a partially gusseted tongue, which will help prevent water, dirt pebbles and other crap from getting into my boot through the gap between the boot and the tongue. I would prefer fully gusseted tongue, but experience tells me that these are good enough. They’re very tough boots, with good solid features for long treks over rough terrain, and well under $100. That’s pretty hard to beat, I am on my 4th pair already, having worn them every day for approximately 8 years running, so I’m not looking to spend $200 to $300 on something marginally better. These are great for me. I’ll spend good money on things, but not unnecessarily.
Well, that’s about it in a nutshell regarding shelter, including clothing. It is a topic with endless options and endless points, but I hope that my particular system has given you some food for thought about what will work for you. Make sure your system is trustworthy, light weight and compact enough to carry in your backpack, and is suitable for whatever climate you are likely to find yourself in. Versatility is an added consideration. Versatility is a very important factor for me. Much of my gear can be used in a variety of ways, adaptable to a variety of needs and situations. It provides a good warmth and protection to size and weight ratio, and I can easily lose pieces of it, willingly or otherwise, and still put together a good, functional shelter. It does not depend on any one, particular piece to work. It all works together, and provides versatility and redundancy, and works in all 4 seasons.
It took me years to get to this point in my shelter system, and a lot of purchases along the way that I no longer use, that I discarded in favor of better items in terms of performance or size and weight considerations. I have used a Kelty Noah tarp for years, for example, and it functioned well enough, and is a solid piece of gear for the price, but it is more than double the size and weight of my new Dutchware tarp, which is smaller, lighter, more waterproof, and more versatile than the Kelty Noah, but also a Hell of a lot more expensive.
Do I regret spending that money on the Kelty Noah? No. I got my use out of it, and it is better to put together a good, solid, budget kit and improve it over time, rather than try and buy top of the line gear one piece at a time, taking years to get your Bug Out Bag together. Start with things that are inexpensive but, most importantly, reliable and durable. Complete your kit first, and then decide where you can upgrade in terms of performance, or reducing weight. As you upgrade, you can sell your old gear, pass it along to friends, or just reassign it to other uses, like your regular camping gear, or even to other pieces of kit, like a Get Home Bag for your vehicle, or a buddy pack, a backup Bug Out Bag that you can give to someone who is caught unprepared in a crisis. There are many good, productive things you do with kit that you upgrade over time.
Well, thank you for your time and your attention, and I hope you have found this article interesting and inspiring.
Now, go buy yourself a fire extinguisher. You should have one. You know that, you just never thought about it before, even though you have smoke alarms. If you gain nothing else from this article, just do that and potentially save your home and your family.
