If there is anything I don’t need more than another knife, it’s another backpack, but when I saw this one on the Goodwill auction site, I couldn’t resist, and put in my bid, scoring this gem for $17!! The shipping cost more than the pack did, but for a total of $40, it was still a huge score.
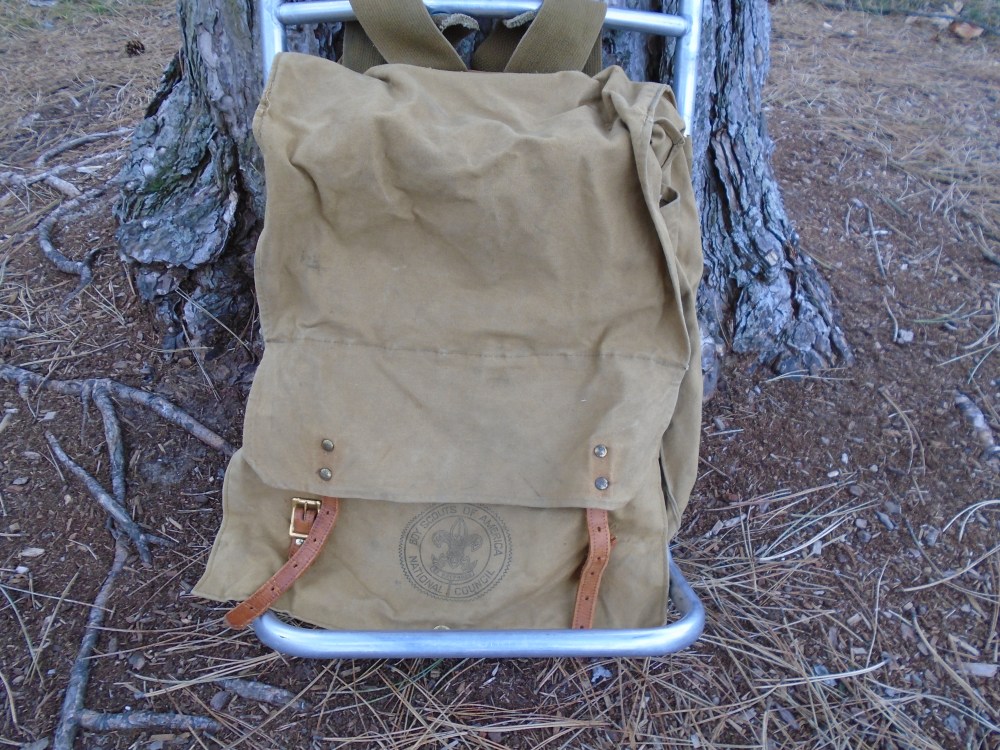
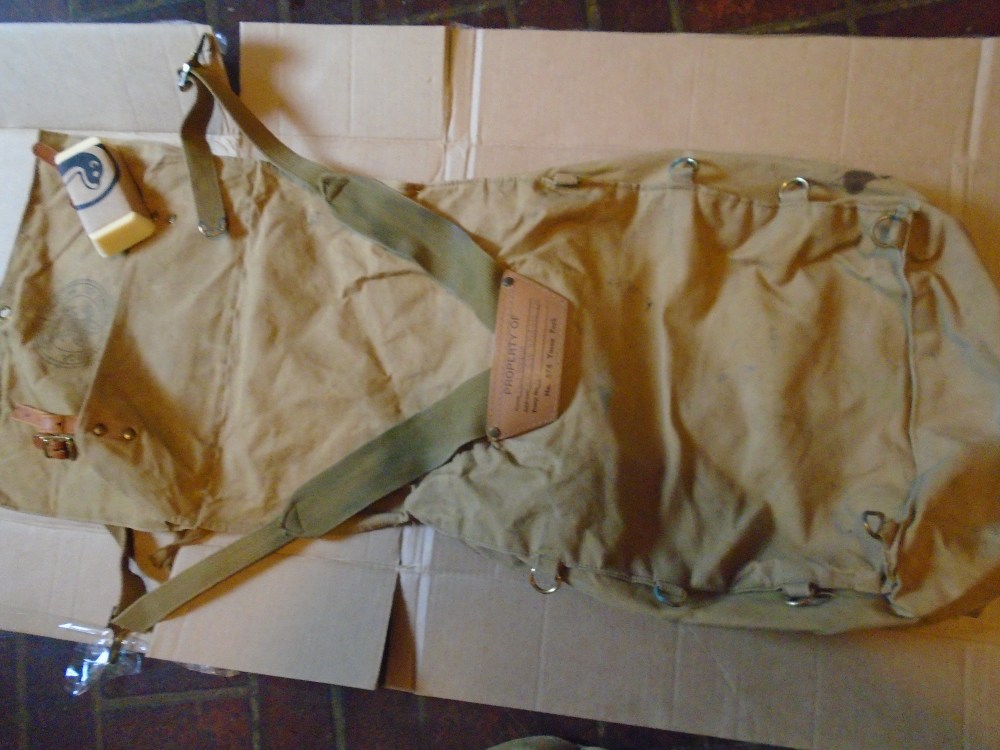
This is an old Boy Scout pack, which I knew almost nothing about, but I knew it was a vintage canvas and leather, which is something I had been yearning for, and it had a frame, which I am a big fan of. ALL of my packs have frames, because I like the way they carry weight, and I like having plenty of airflow on my back when hiking.
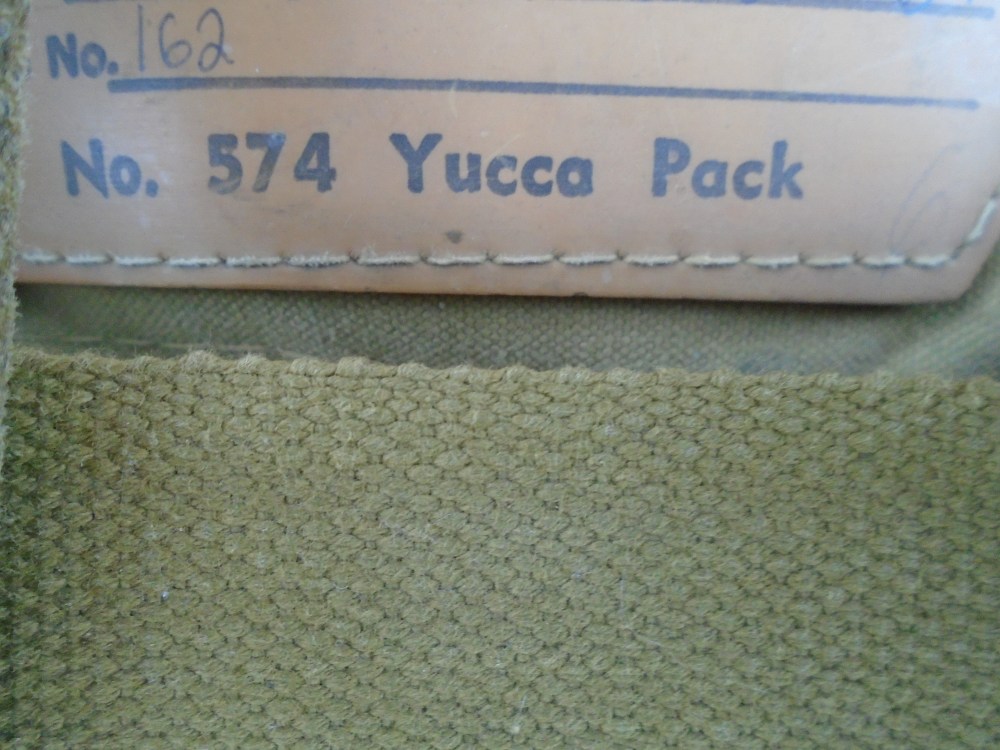
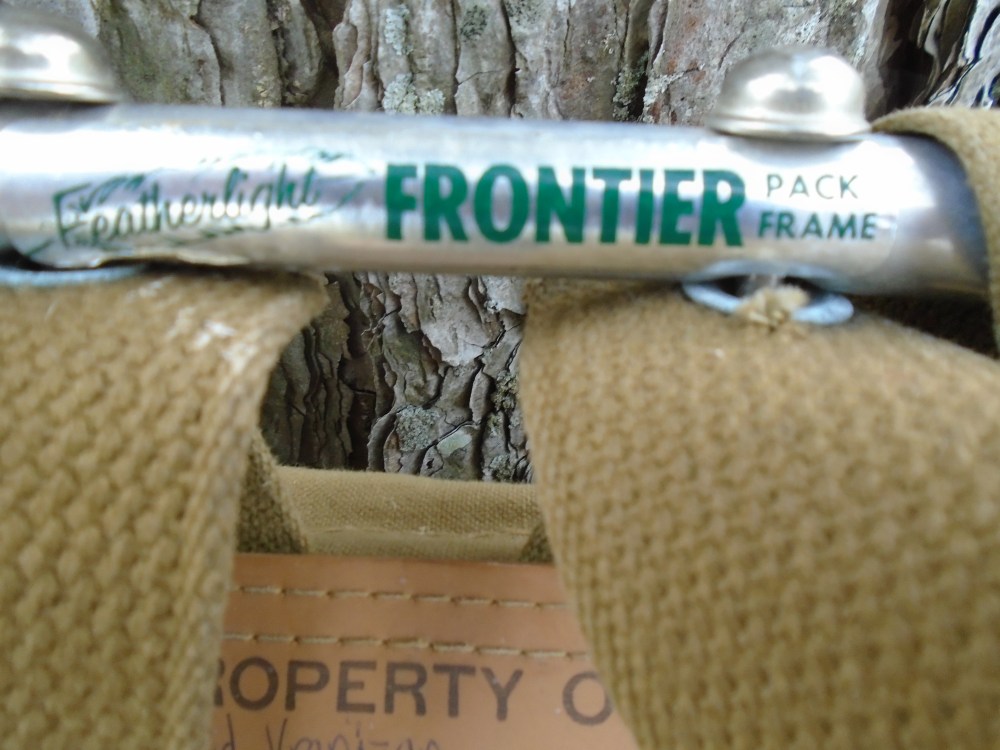
This pack was originally produced in 1931 for the Scouts, and remained in production and use right up into the 60’s, as far as my reasearch could tell me. The pack itself was not made with a frame, and can be used without it simply by unclipping it from the frame, but the frame was something designed for the Scouts, specifically to be used with Scout packs, sometime in the late 50’s. They are still common enough to be found on Ebay and other sites, but finding one in such good condition and with the frame, is not so common. Often, you see the straps are broken off completely, or rotted, but on this one, they look to be in pretty good condition and still strong.
To quote a friend on the BCUSA forum, “When Hillary and Tenzing Norgay climbed Everest in 1953, the expedition’s porters used aluminum pack frames. They became all the rage. I joined Scouts in June, 1954 and was told multiple times that I HAD to get an aluminum pack frame for my new Yucca Pack.”
Now, that’s the kind of thing that you can find on BCUSA, amazing depth of knowledge and experience in any sort of outdoors topic. As far as I can tell, this particular pack was made around 1960, give or take a few years, based on the particular features and the BSA logo.
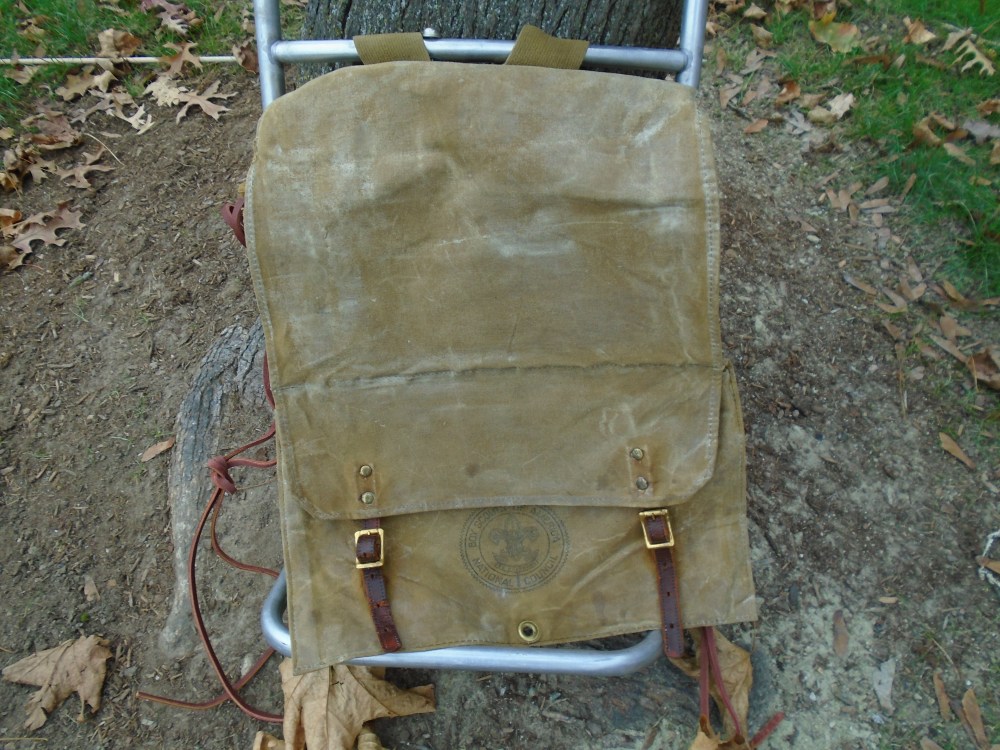
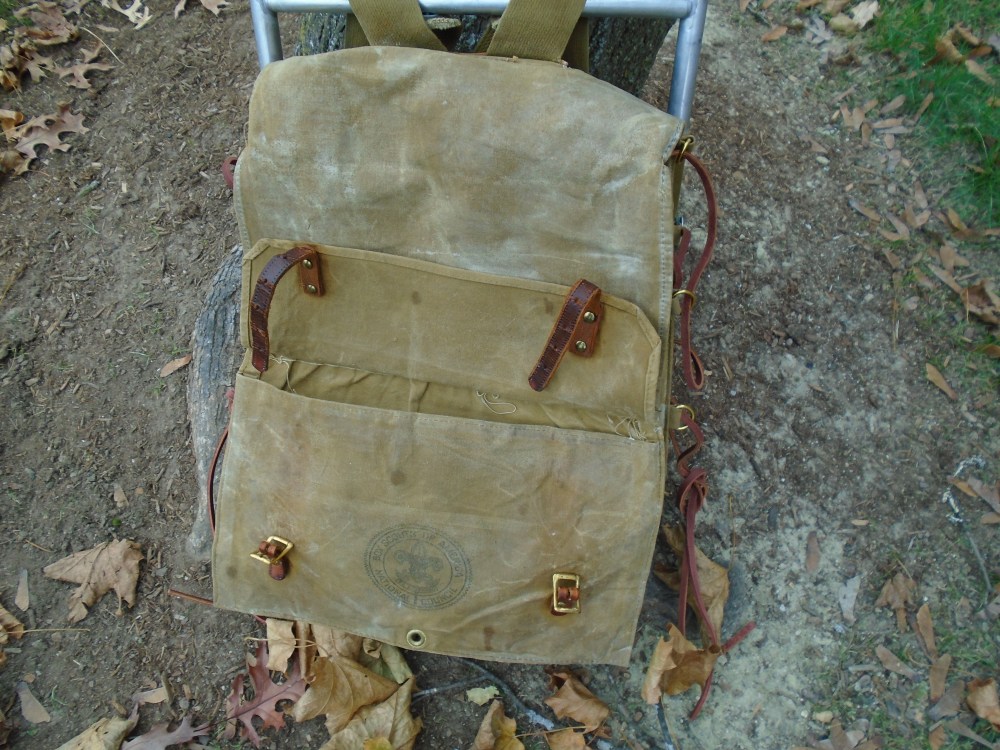
The pack is basically a rucksack, with one big bucket inside, with a flap on the top that covers the back of the pack, and has a fairly large pocket in it.
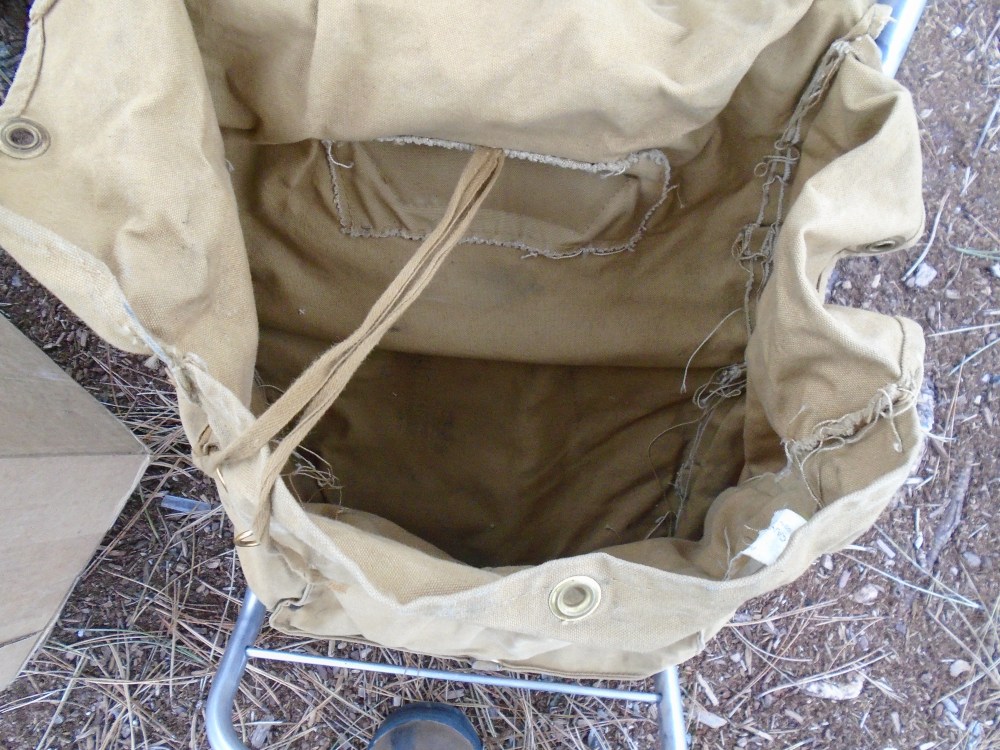
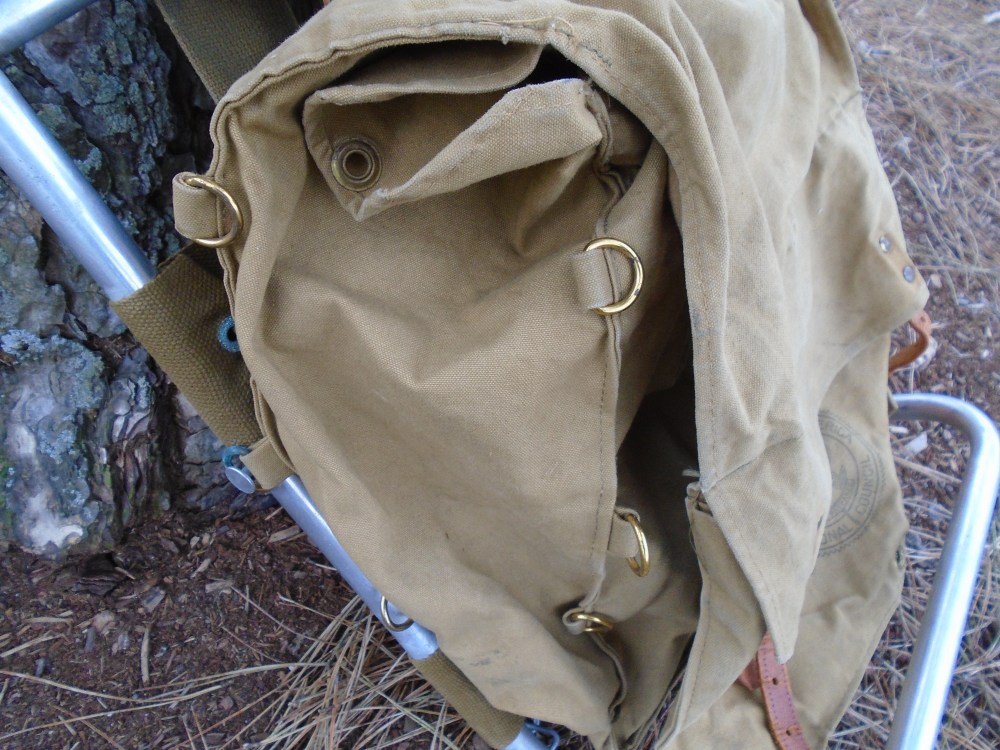
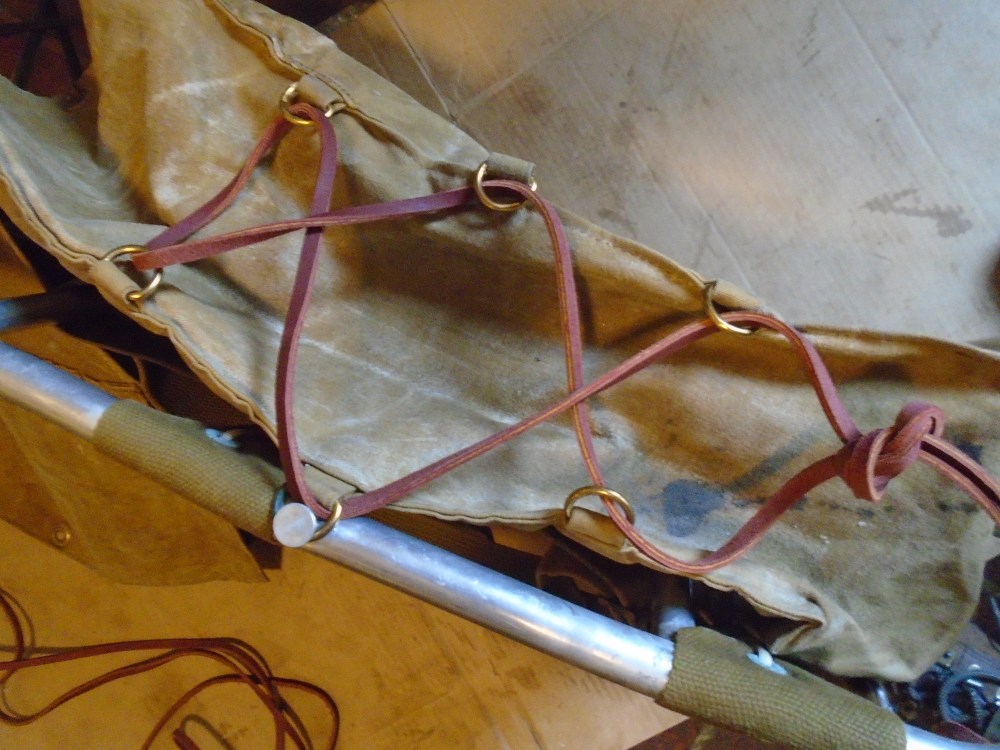
It is attached to the frame through the shoulder strap on the top, with the shoulder straps clipped to the crossbar on the bottom of the frame, and one D ring on either side of the pack is attached to a Clevis pin on the frame. The frame itself has it’s own shoulder straps riveted at the top and clipped to the bottom of the frame, so it is perfectly possible to decouple the pack and frame and use both, if you are at camp, say, and wanted to stash your pack in your tent, and use the frame to carry firewood back.
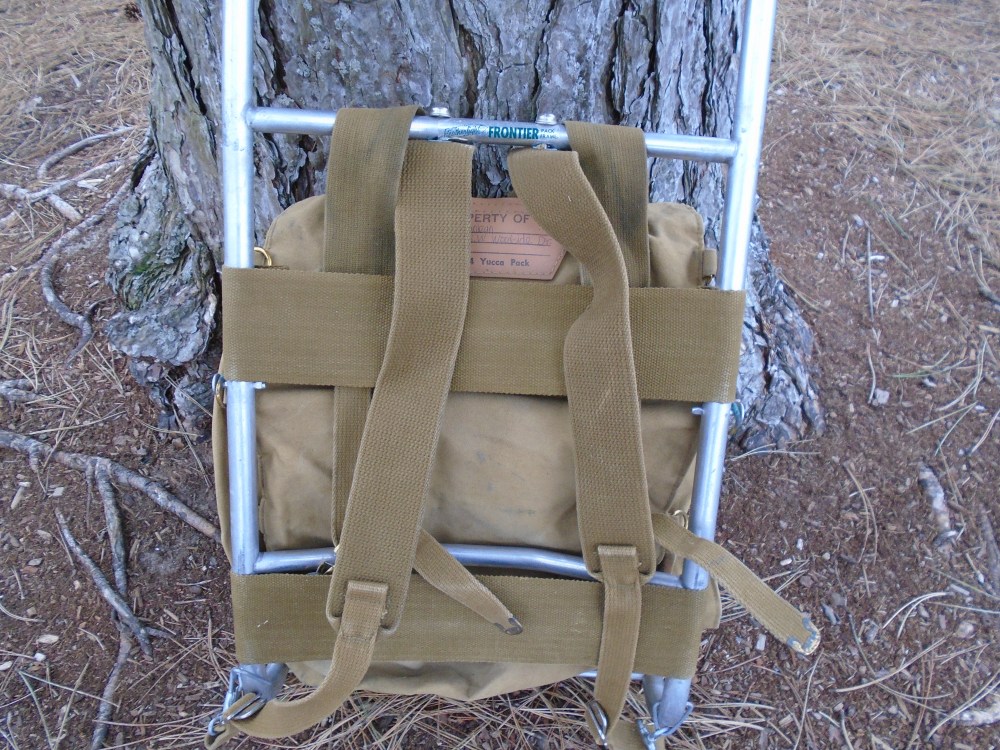
The frame itself is incredibly light, and the whole rig really weighs very little, when compared to my other framed backs, the Swedish LK35, the Norwegian Telemark, and the Kelty Trekker, and definitely lighter than the Eberlestock Warhammer. I was actually looking for this frame to swap it with the steel frame the LK35 comes with, but now I have changed my mind, and I think I will sell my LK35, which has served me well for years, and use this Yucca pack as my daypack.
One thing that was missing from the pack, which is not unusual, is the cotton rope that is on the sides of the pack, used to either compress the pack, or to lash things like a blanket to the pack, but the brass D rings were intact and in fairly good shape, aside from some tarnish. Interestingly, it appears that the brass in contact with the aluminum is responsible for some chemical reaction causing the green tarnish.
So, what were my plans for this pack? Well, let’s get to it!
First, I want to turn my canvas pack into a waxed canvas pack. I chose Otter Wax, which is a wax and vegetable based oil mixture, and has the texture of a bar of soap.
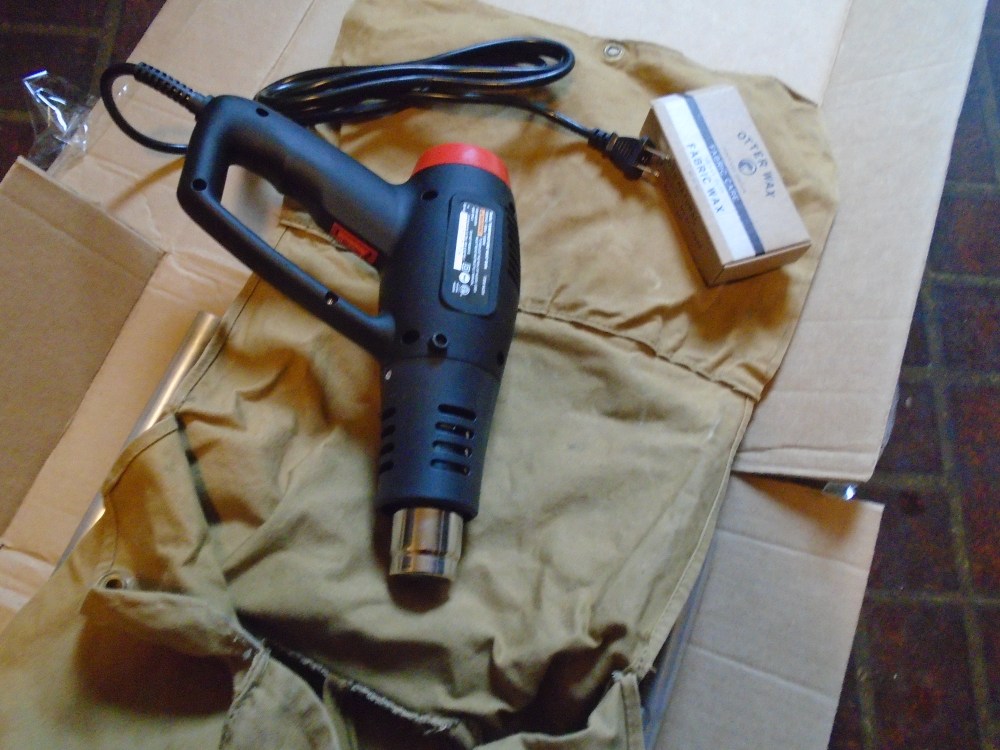
I removed the frame from the pack, and began vigourosly rubbing the wax onto the canvas, by pushing the bar back and forth, and then with a circular motion, to get as much wax onto the canvas as possible, paying extra attention to the seams. Then, I hit it with the heat gun, which melted the wax, and warmed the canvas. While still warm, I would run the wax over it again, and one more pass with the heat gun. The canvas darkened a little as it absorbed the wax, and I would keep checking the backside of the canvas I was working on, to see if the wax penetrated all the way through the canvas, reworking areas that the wax had not reached all the way through the threads.
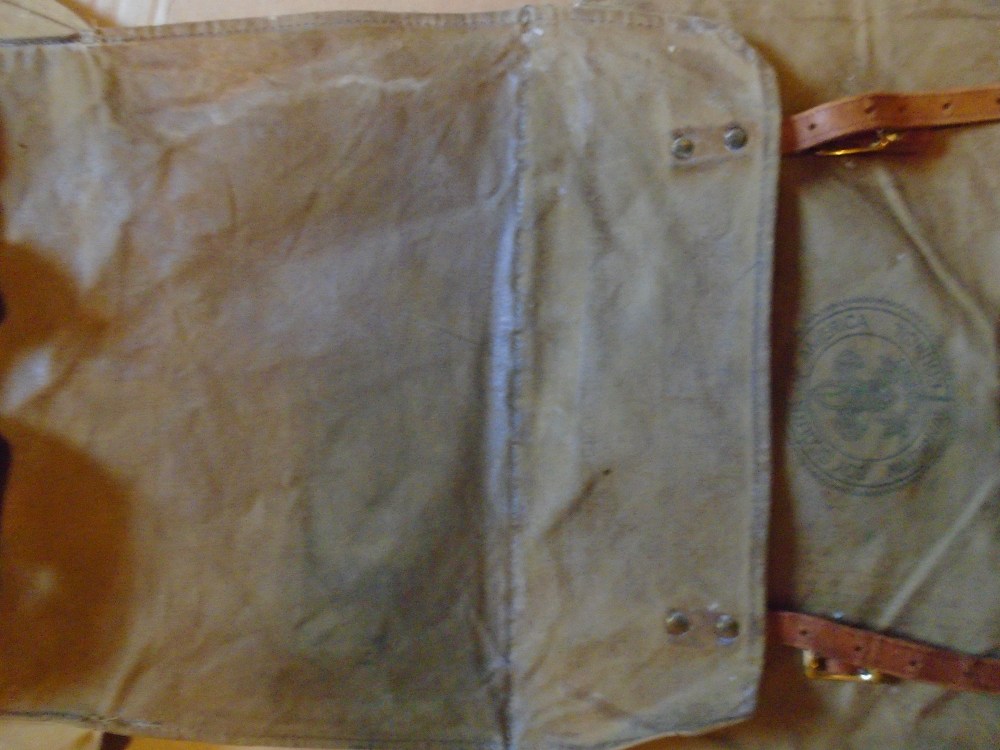
I made sure to get the top flap as saturated as I could, as this was the most exposed part of the pack when being used in the rain or snow. The canvas darkened, but the BSA logo remained crisp and clear.

This took some time and effort, but it wasn’t hard, and was really quite gratifying in a way, as I could see the progress being made as the light canvas darkened and developed the iconic waxy deposits as the canvas was manipulated.
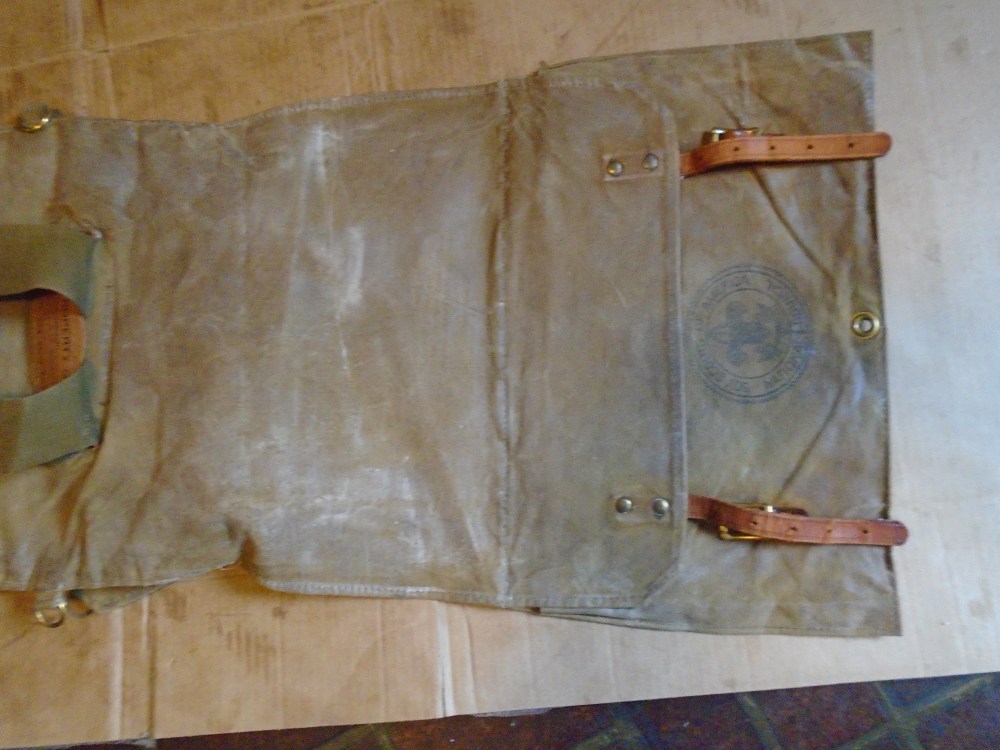
Once I felt the pack was waxed thoroughly, or as thoroughly as possible with the amount of Otter wax I had, it was time to address the leather straps, which were still in pretty good shape, but unsurprisingly a bit dry and cracking. For these, I chose good old Obenauf’s.

I love Obenauf’s. I love the smell, I love how it softens and revitalizes old leather, and I love the color it imbues the leather with, darkening it to a reddish brown color that I find very appealing. You don’t want to use it on loadbearing stuff, like tool pouches and hammer loops, because it softens the leather too much, but for straps and belts themselves, it works great.
That was quick work, and I tried to get plenty of the Obenauf’s on the sides of the straps, without getting too much on where it would leak into the canvas, but just enough for it to completely be absorbed into the straps.
Last, but not least, at least for today, was to replace the lashings on the side. Rather than choose cotton rope, as was originally on the pack, or paracord, which would be great but not really traditional, I bought a set of leather boot laces, to keep the leather and canvas theme of the pack.
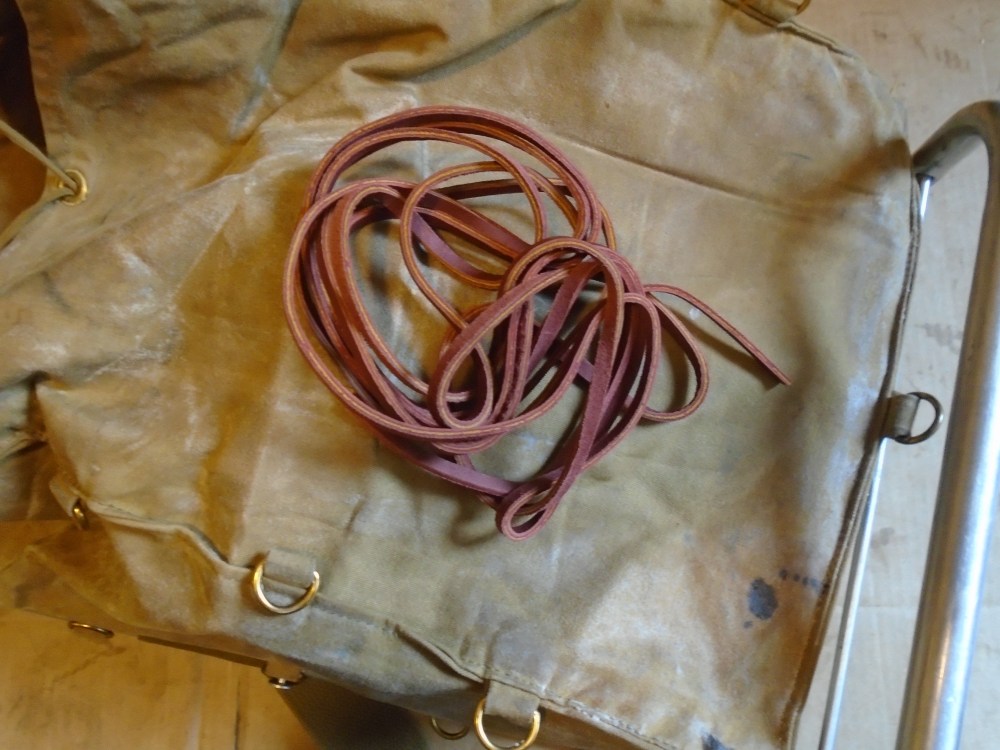
It was a good choice, as the color came to match the straps reasonably well, and it looks great with the brass. They are a bit long, but I will trim them later when I decide what length I need to keep their functional ability to lash things like blankets, and later on, I will carve a set of antler toggles for them. The old pictures of this pack showed the lashings to be laced top to bottom, so I did the same.
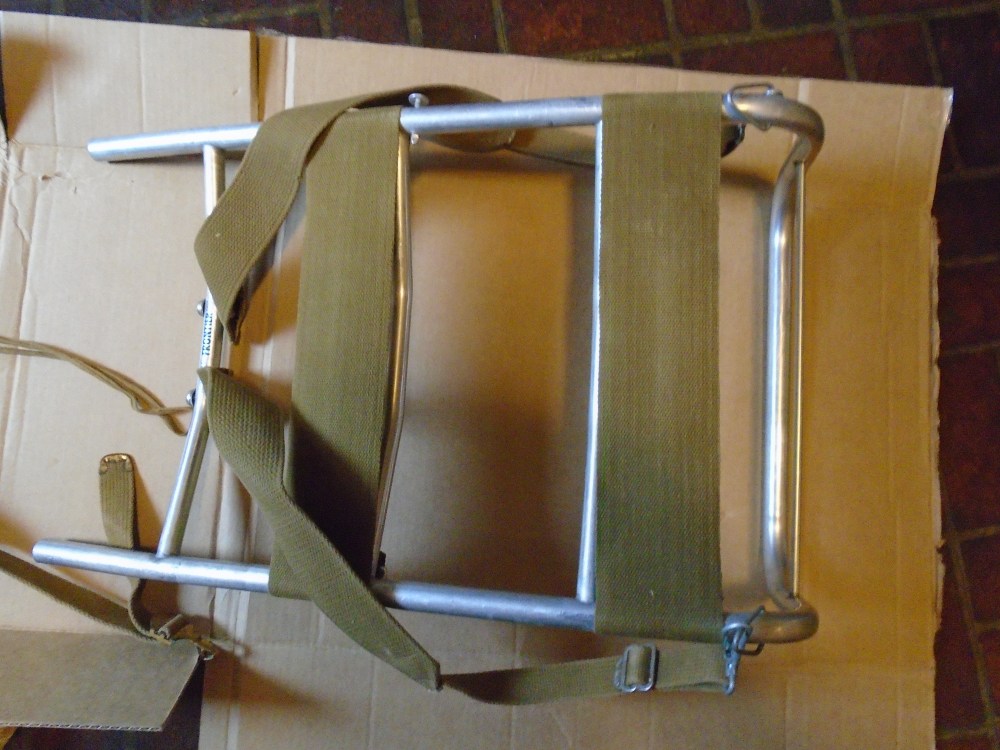
Now, my old/new pack was finished! I still have to carve the toggles, trim some of the loose threads, and find something to replace the caps at the top of the frame so it wouldn’t be open, but the main part of the work is finished, and I am quite happy with the results…a vintage canvas and leather pack, waxed for waterproofing, on a lightweight pack frame, with tons of versatility. I think it looks great!
Eventually, with the antler toggles, and a little cleaning up of the brass, this pack will be one that I can be proud of, and will have many, many years of life left in it yet!
Why spend hundreds of dollars on an expensive leather and canvas pack, when you can bring an old pack, one with history behind it, back to life, for under $50? I couldn’t be happier!
Soon, it will be time to put her to use, and I can’t wait!
